When you build your arrows, you will have your choice of color customization for the shaft, the nock, the head, the 'on' and 'off' fletching colors, and any identifying banding behind the head. It is a good idea to check with other archers in the Realms to make sure your arrows don't use the same color scheme as theirs, to avoid after-battle cleanup confusion! Unlike weapons, arrows tend to get strewn all over the field and will be fired by many different archers during the course of a battle. You never know where they end up, and being able to find and recover 'your' arrows between battles is important!
For example, Mayerling arrows use a red shaft, black head/nock, red ID band, red 'on' feathers, and black/white barred 'off' feathers.
Please note that this guide is for making arrows with the narrower T5 core, which is Mayerling's predominant choice of arrow. The same procedure can be used for a T8 core – just be sure that the blade foam and fender washer you have on hand has a diameter that fits the core you choose.
Without further ado...
Materials:
T5 fluorescent light tube guard (source: buytubeguards.com)
Fender washer, 1” diameter (source: Lowes)
open cell foam, 2” thick
Blade foam, 5/8” thickness, 1” inner diameter
Trueflight full length feather, in 2 colors (source: Hall's Arrow, Manchester, CT; also available on amazon)
hot glue gun (and glue)
Sharpie – I use two, black and silver/gold
tough scissors
strapping tape
duct tape
electrical tape
pin / exacto knife / steak knife / other pointy object
Time Required:
1 hr of labor per arrow. If done with a group of friends in “assembly line” fashion, this can be significantly reduced.
Step I: Prepare the tube.
I buy my T5 arrow tubes from buytubeguards.com, where they come in 4' lengths with caps. The caps are unnecessary – remove them. 4' is far too long for an arrow, so the first step is to cut it down. I have found with the Realms poundage limit on bows, a 3' arrow from nock to tip will be suitable for every bow, from the inexpensive WalMart / Dick's variety up through much nicer 28-29lb wood/fiberglass compound bows, such as the one I use. To cut the arrow to size, make a mark in sharpie at 37” from one end and cut. Good, tough kitchen scissors will slice the plastic easily.
Step II: Build the nock.
 Take the 'jagged' end you just cut in hand. Make two marks, 1” down along the tube and opposite
 each other across the tube diameter. The point of the V of your nock will rest here.
Slice perpendicular from the end of the tube down to the mark you just made. You will do this once for each mark.
Slice at a 30 degree angle from the end of the tube to the mark/slice, resulting in cutting out a “v” section. Try to make the two “v” cut-outs approximately the same size. Make absolutely sure that both “v” cut-outs are equally deep (even if the width varies slightly). There should be a little bit of the edge of the tube still uncut.

 Now we need to reinforce the nock you just cut, using strapping tape. Take a short segment of tape and form a V, sticky side out, non-sticky side folded against itself. Place this V so it nests at the bottom of the nock. Then, take your scissors and slice the tape from the edge of the tape up to the shaft of your T5 (as shown). This will create two tabs of tape: fold these smoothly flat against the T5 shaft.
Using more short pieces of strapping tape, seal off the remainder of the nock, smoothing the ends of the tape flat on the outside as you go. When you get to the top, you will need to make a few diagonal cuts to get the tape to lie flat. If you are left with any extra bits, trim them off. Your strapping tape should now “seal off” the nock interior, so there are no holes from the outside of the tube to the inside.
Take a final piece of strapping tape and wrap it about the base of the nock, just below the cut.


Step III: Build the arrowhead.


Affix the 1” fender washer to the arrowhead side of the T5 shaft, by creating an “x” of strapping tape that holds it in 4 places to the shaft. Reinforce by wrapping a third piece of strapping tape around the shaft to hold these tabs down.
Create a 2” thrusting tip, and affix it to the fender washer with the same “x” process.
Slice yourself a 4” piece of blade foam.
Shave the bottom 0.5-1” of the foam at 45 degrees with a series of shallow scissor slices, resulting in an angle.
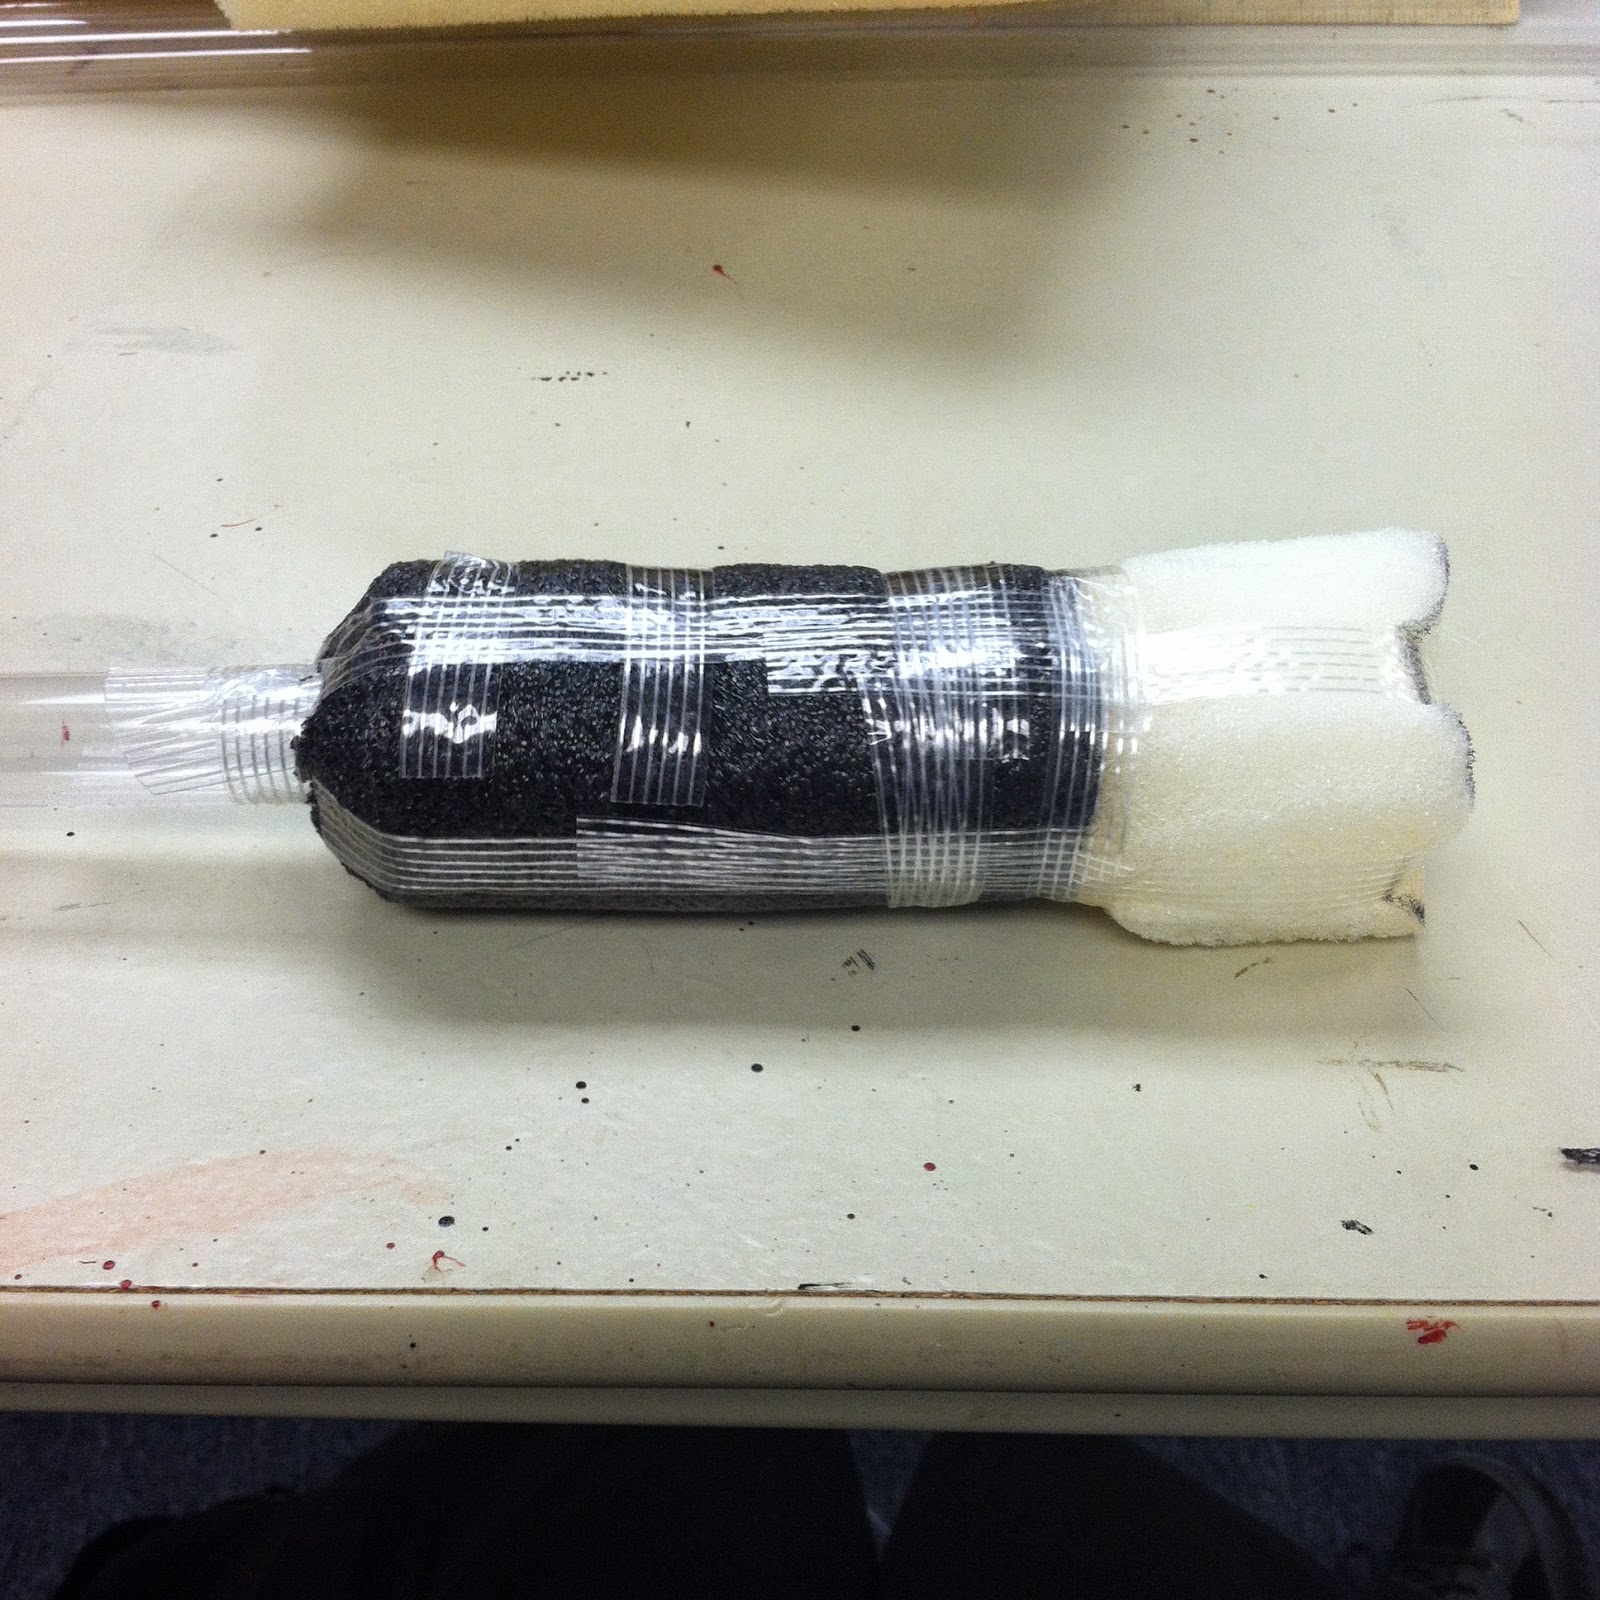
Slide the blade foam onto the arrowhead, such that the flat (unshaved) portion is flush with the thrusting tip, and the shaved portion sits on the T5 tube. You may need to slice the foam along the seam to accomplish this. Either way, securely strapping tape the seam shut crosswise.
 Affix the blade foam arrowhead to the thrusting tip and to the shaft of the arrow with the same “x”process.
Use the arrowhead (or a spare piece of blade foam) to trace and cut a 2” thick squishy tip.
Affix the squishy tip to the end of your arrowhead using the same “x” process. Take a piece of strapping tape and run it along the seam between the blade foam and strapping tape.
You have now created the “skeleton” of your arrow!


Step IV: Tape the nock.
 Select duct tape in your identifying color of choice for the nock.
Cut a small square. Fold the duct tape (carefully!) so the non-sticky sides are together, and slide it down into the nock just like you did with the strapping tape. Cut from the free ends of the duct tape in to the point of the nock, and fold down the tabs, as above.
Take a second piece of duct tape and place it inside the nock, slightly overlapping the first. Slice from the top of the tape down towards the points at the back of the nock, at a slight angle, as shown.
Fold down the tape, starting with the middle, and then smoothing each side. Trim any excess.
 Cut a longer strip of duct tape, approximately 7-8”, to extend the duct tape surface of the nock. You will probably require 2 (or 1.5, if you want to slice it the long way) in order to completely circle the shaft of the arrow. This is important to properly affix the fletching later.


Step V: Tape the arrowhead.
 Where the duct tape would overlap the shaved portion of the arrowhead, keep it free. Slice this part of the tape into 3 tabs. Smooth them down one at a time, overlapping slightly, to follow the contour of the shaved arrowhead. The duct tape should be long enough to continue a little ways onto the shaft of the T5.
Slice the duct tape the same way where it would overlap the squishy tip of the arrow and similarly overlap. Be careful not to compress the squishy
tip too much when doing this.
Continue around the arrow, until the entire circumference has been taped.
Wrap a short piece of duct tape around the shaft of the T5 so that it covers the tabs at the “foot” of the arrow. Do not be afraid to really muscle this into place tightly to get it wrinkle-free.
 Cut a SQUARE of duct tape and place it on the arrow tip, folding the corners down lightly.
Cut a short length of duct tape, perhaps enough to go 1/3 of the circumference of the arrowhead. Place it length-wise on the head so that half of the tape is on the head, and half extends above it. Slice this extra “above” tape vertically in half-inch tabs. Fold them neatly down sequentially around the arrowhead.
Repeat step 7 until the circumference of the arrow tip is reinforced. (This usually takes about 3 pieces.) Then take a single piece of duct tape and wrap it about the circumference of the arrow, so that on top it overlaps the 3 pieces you just added on, and extends down into the body of the arrow. Do not be afraid to muscle this into place to keep it free of wrinkles!
Use a band of electrical tape to further customize your arrow and make it easily recognizable by you on the battlefield. (Great place to write your name, too.)
 Use your steak knife / pointy object to make holes (I prefer slits) all around the arrowhead on the sides, ranging from up near the tip down to the edge of the squishy foam. How many slits, you ask? I usually do 50-60. If you are using a pin to make holes, do more.


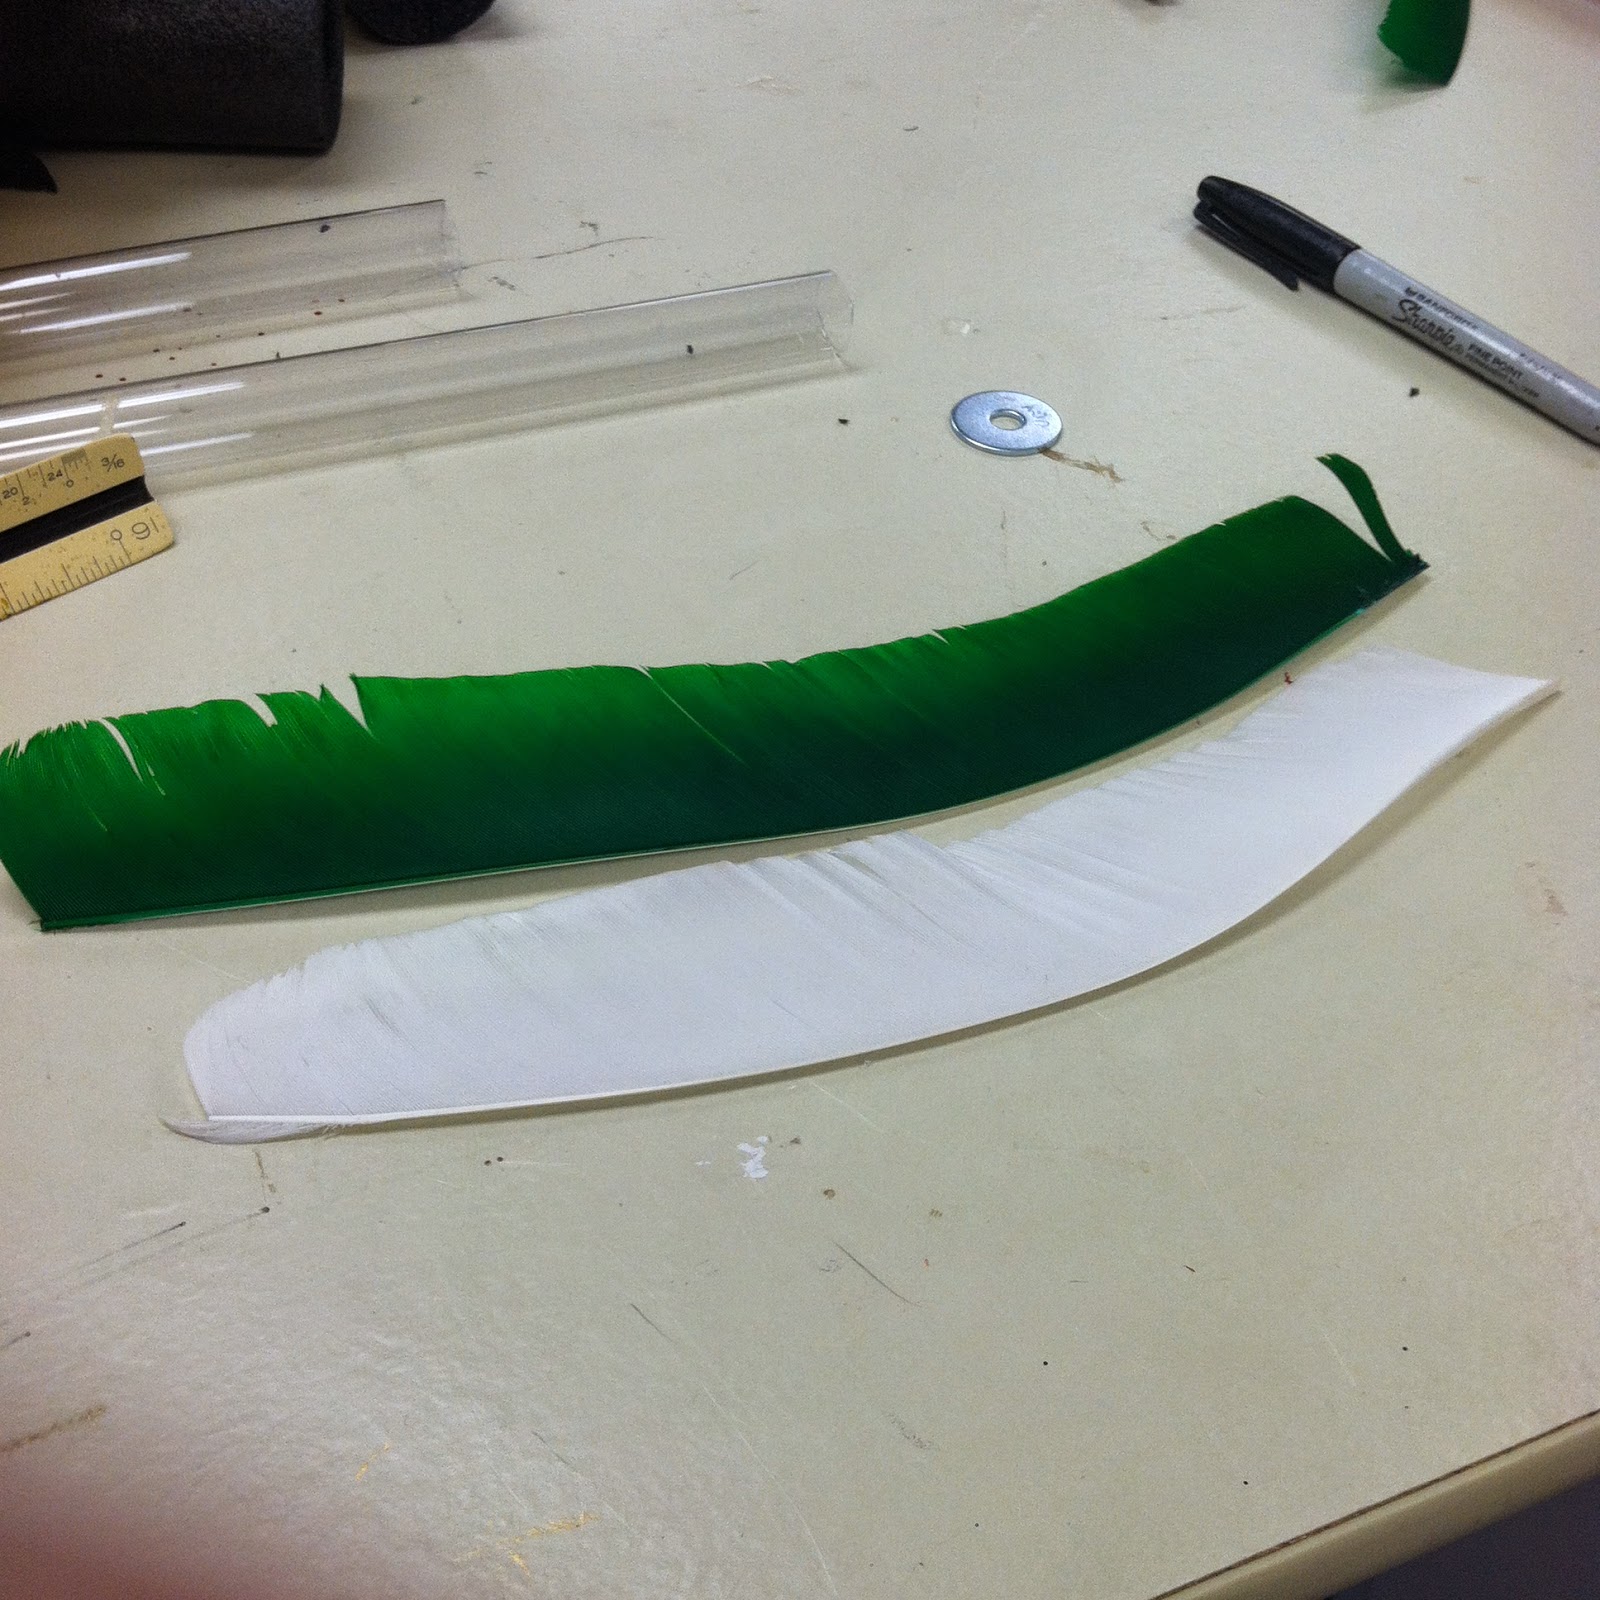
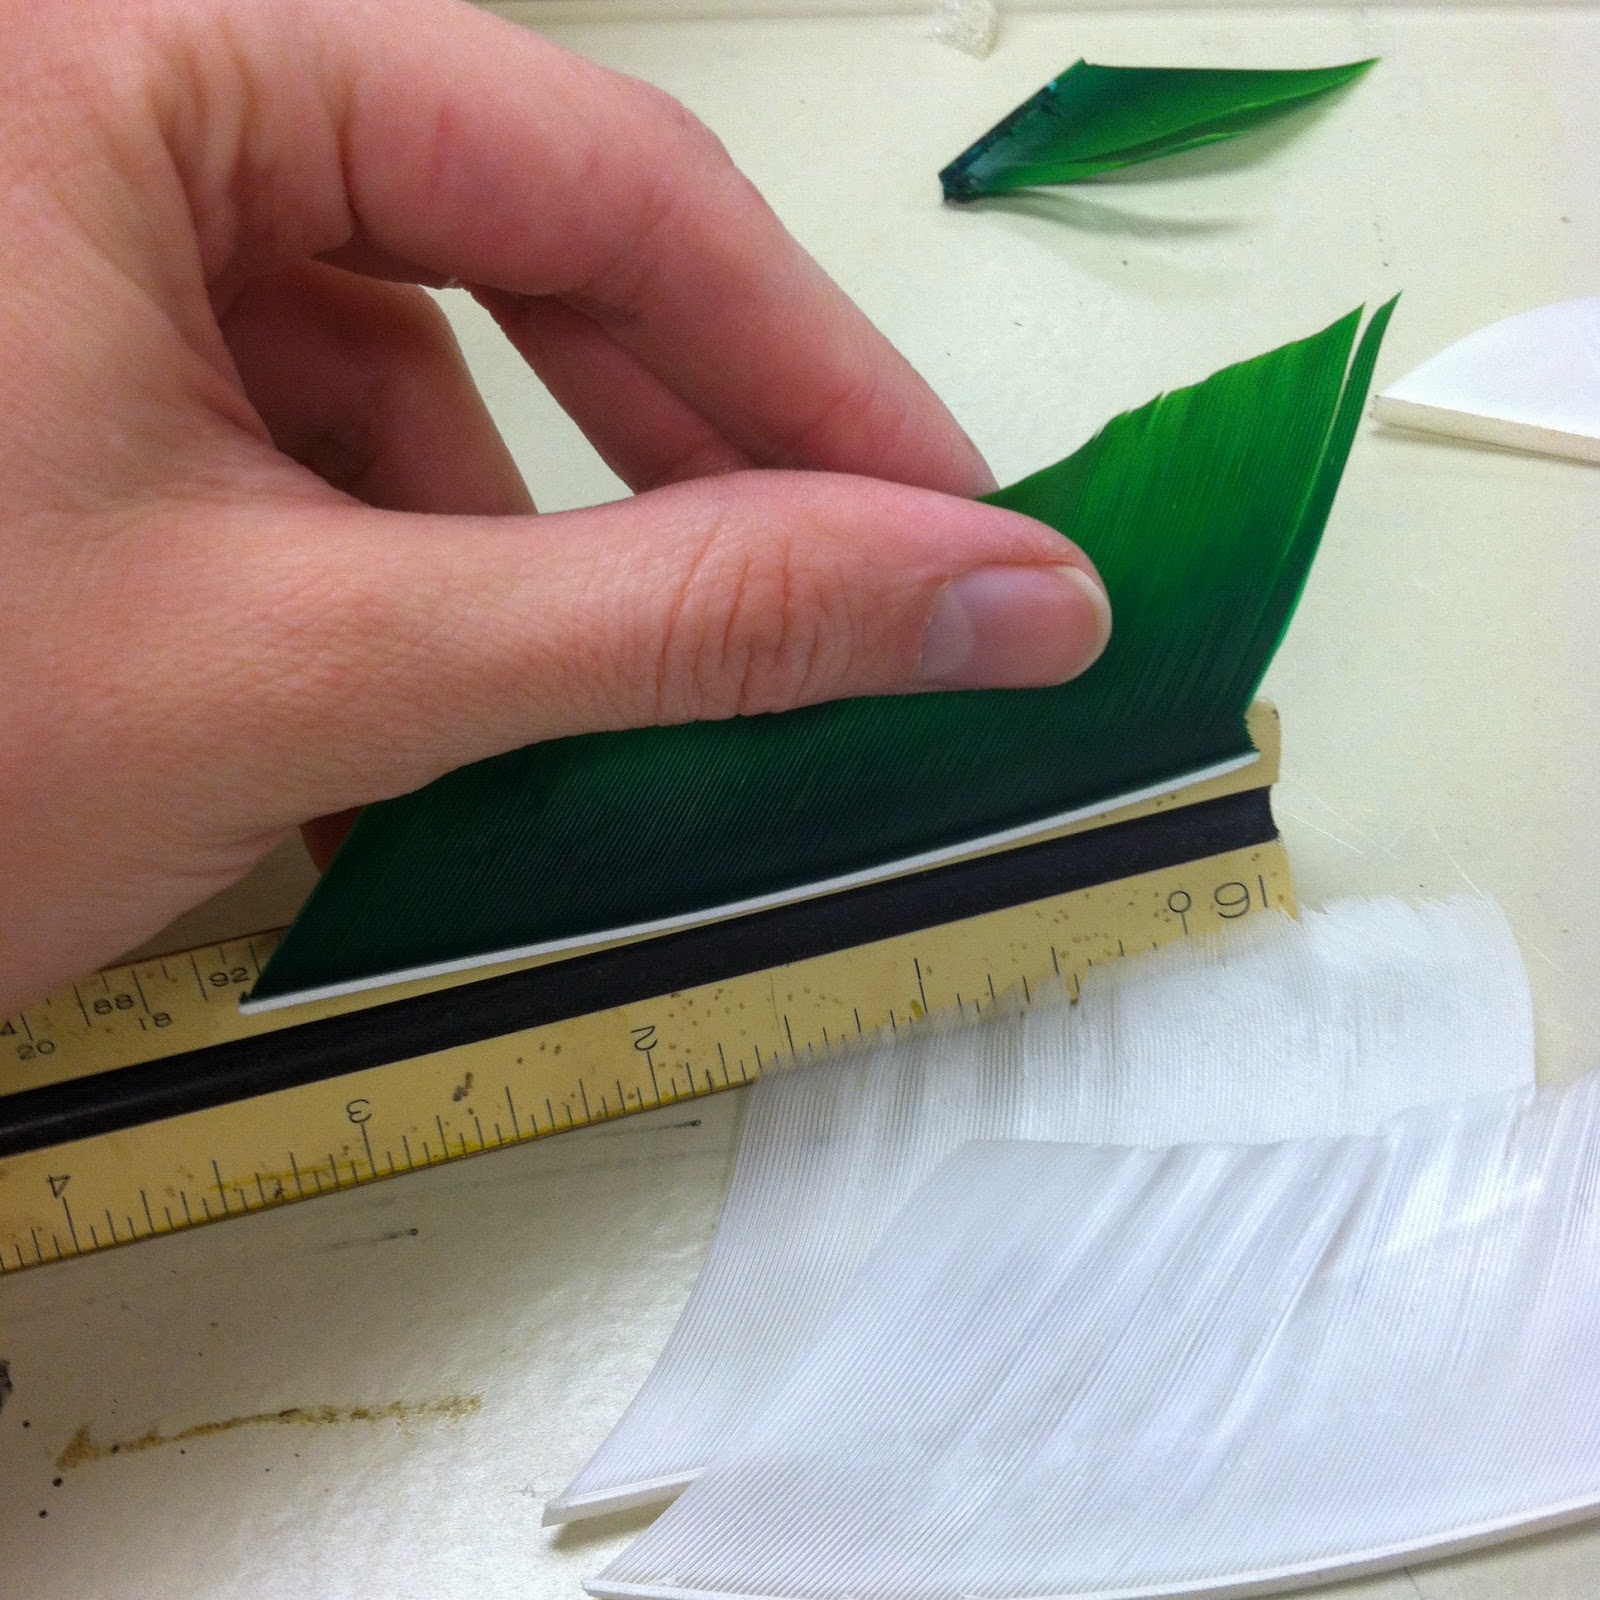
.JPG) You will need feathers in two different colors for this exercise. A single full-length TruFlight feather will usually give you 3 fletching-size “pieces”. Cut your full-length feathers down to about 3” sections. For each arrow, you will need 3 such sections. Two should be in the 'on' color, and one in the 'off' color.
You will need feathers in two different colors for this exercise. A single full-length TruFlight feather will usually give you 3 fletching-size “pieces”. Cut your full-length feathers down to about 3” sections. For each arrow, you will need 3 such sections. Two should be in the 'on' color, and one in the 'off' color.Mount your arrow on the bow, as shown. Make a mark in sharpie about 1-1.5” from your fingertips, NO CLOSER. You want this mark to face “outward” when your arrow is fixed on the bow.
Place 2 more marks on the duct tape, the same distance from the end of the arrow, and equidistant (approximately) around the circumference of the bow.
 Take a straightedge. You are going to draw a “guidance line” for your fletching – several inches long at least. You do not want this line to run straight up and down the arrow, but at a (very!) slight angle, as shown.
Turn your arrow so that the first mark you made – the one that faces “outward” when the arrow is on the bow – is facing towards you. This is the mark where your single 'off' color fletching will be attached. DO NOT MIX THIS UP or you will have to go back and tear it off again later!
With a dot of glue, affix the back of your fletching to the “+” made by your mark and the guidance line. With another dot of glue, affix the point to the line as well.
 You will notice one side of your feather has a little “ledge” where it meets the duct tape, and the other side (the “back”) will be flush with the arrow. Use your fingernails to hold the “ledge” side of the feather flush against the duct tape. Apply hot glue liberally down the “back” of the feather, in an unbroken line down its whole length. Apply pressure on the “ledge” side so that the fletching binds firmly to the duct tape.
After the glue has cooled – and ONLY!! after it has cooled – you may apply hot glue to the “ledge” side, also in an unbroken line. Go back and put an extra dollop of glue on the “point” of the fletching, where it makes an obtuse angle with the arrow.
Repeat this procedure at your two other fletching marks, affixing the two 'on' color fletchings to the arrow.
You don't actually need all that fletching for your arrow to fly true – it just adds to the drag. Take a pair of scissors and carefully trim the fletching so it is about half its usual breadth.
 Load your arrow onto the bow, and check one last time to make sure that the 'off' color fletching faces outward. Now you can tell at a glance which way to nock your arrow.


Congratulations – you've made an arrow, Mayerling style!
A few last notes...
Arrow maintenance:
- While arrows can survive the rain, it will do a number on your fletchings. Prepare for bedraggled fletchings if you use it in the rain or in water.
-Avoid leaving your arrows in a hot car, as this will warp the duct tape heads.
Also, arrows tend to fail in three ways.
 First, and most common, your fletching will peel off, usually point-first. This is easily fixed by melting the existing glue and re-affixing the fletching with a glue gun. Or, if the fletching has been stripped off entirely, scrape away the old glue and re-fletch with a new feather. You may also do this if your fletching has not peeled away but the feathers have gotten badly bedraggled or mostly broken. It will make a world of difference in how the arrow flies.
 Second, the arrowhead can break down. This is caused either by a compacted tip (which will have to be replaced), or sufficient wear/splitting on the arrowhead that the interior squishy foam shows through. In this case, the head of the arrow will need to be retaped (and new slits cut). This tends to be a problem if you do a lot of practicing in the Uconn arena, for example... the concrete really chews away at the duct tape – and is the main reason I use duct tape, not socks, for arrows. They are more durable to concrete impacts.
 Third, the shaft can split or crack, rendering the arrow unsafe. THERE IS NO FIX FOR THIS. You may salvage the arrowhead or fletching if you wish / if they are in good shape, but the tube must be discarded. Remove from play as soon as you see signs of splitting or cracking!
It is important to inspect your arrows before and after each practice session, and multiple times during an event or a lull between war maneuvers, and remove any arrows from play that need further attention / repairs / to be discarded. You don't want another archer to pick up your 'retired' arrow by accident.
A lingering question with arrows is always their lifespan. I can say this much: in addition to their appearance at events, Mayerling uses its arrows on a weekly basis at Uconn SMAC practice. With multiple archers, especially in the concrete indoor arena, they see hard use. They are swatted out of the air, shot into and across concrete, stepped on, and generally abused. A conservative guess estimates that Mayerling fires anywhere from 400-600 arrowshots each practice; with about 50 active arrows, this is 8-12 shots per arrow per practice per week. With this use, I have never had a T5 arrow shaft break in under a year of service. My current arrow retention rate is 80-90% after 3 years of use; with the colored/translucent T5 shafts, I have yet to have any shafts crack after 2 years of use. They appear to be slightly thicker and tougher than the clear/transparent T5 shafts. Keep this in mind when ordering.
Good luck, happy shooting, and if you ever have questions regarding arrowcrafting or archery at an event – approach me! I'm the one in red, with the Dragons.
Charwindle
Captain of Mayerling