PART 2: MECHANICS
At some point, you find yourself ready to take your archery
to the practice fields. You have
acquired a bow and you like the feel of it in your hands. You have made yourself a set of arrows, and a
quiver you feel comfortable carrying them in.
Like Archimedes, you have a lever and a place to stand; time to start
moving the world.
This section covers the basic mechanics of archery. I don’t mean the physics of the bow’s
elasticity and the flight of the arrow here – I mean the day-in day-out
physical know-how that will help you develop a good, steady pattern, with the
right muscle memory and instincts in aiming, to put your arrows to good
use. This section talks about (1)
drawing and holding arrows, (2) loading your bow, (3) taking multi-shots, (4)
aiming, (5) basic warm-up drills, and (6) shooting at different weapon
combos.
(1) Holding
vs Drawing Arrows
An archer is only a threat when they have an arrow on the
bow. This is the sad, fundamental truth
of archery. A smart fighter will wait
until right after you loose your arrow – whether at them or at another target –
to charge you, before you have a chance to bring another arrow to bear. There is no way to avoid having these
vulnerable moments entirely (though plenty of ways to minimize them through
wise positioning). There are, however, a number of techniques to
cut down on your reload time, and maximize the occasions when you are a threat.
The downtime between archery shots can be broken into two
phases: the act of acquiring an arrow from your quiver, and then the act of
physically loading the bow. One of the
classic ways of speeding up archery is to skip phase 1 entirely. Every archer worth his salt will start combat
with multiple arrows already in his hands.
Boff archery cripples us in this regard, in that our arrows are
considerably thicker than historical arrows and are therefore unwieldy. However, you can still have at least two, and
frequently three (or more) arrows “on hand” when Lay On is called.
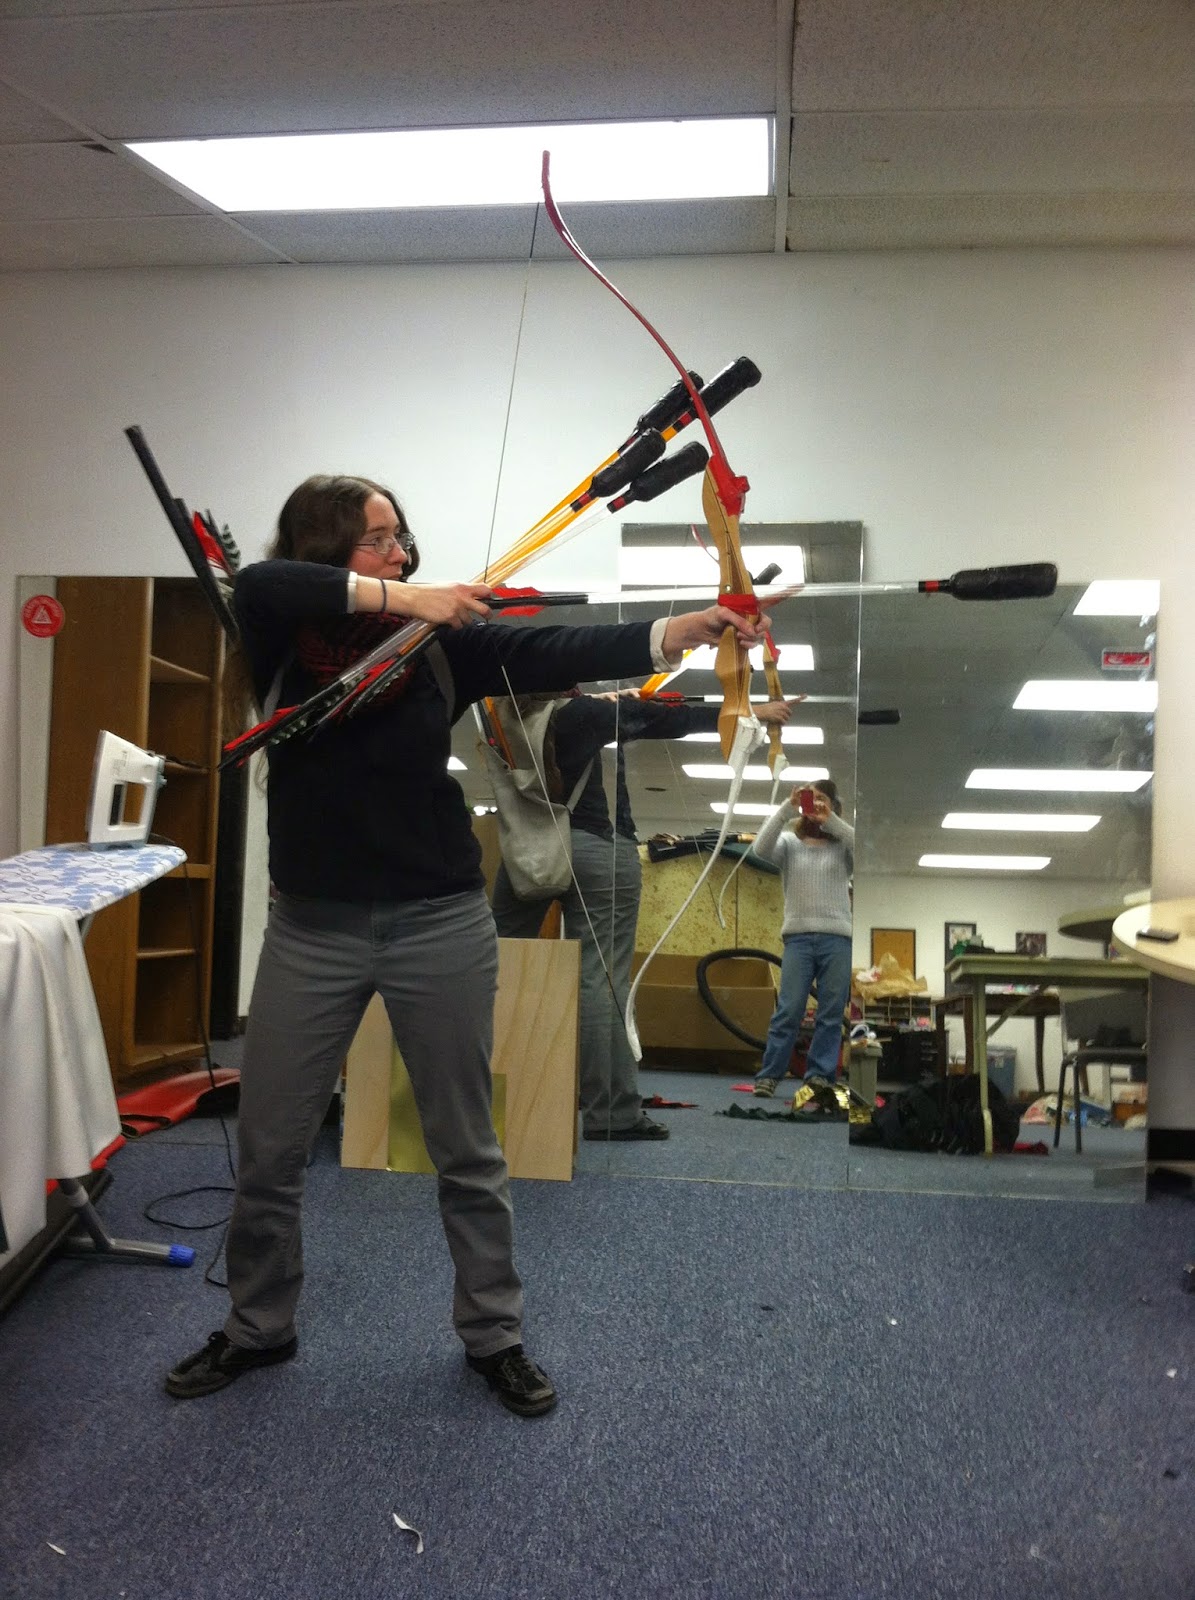
These additional arrows may be held in the bow hand or in the draw hand.
For 1” shaft arrows, it is easiest to hold one in the draw hand, one nocked to the string, and one in the bow hand. You shoot the nocked arrow first, then the arrow in the draw hand, then the arrow in the bow hand. This is 3 rapid shots before you have to reach for your quiver.
 |
| One in the draw hand, nocked, and in the bow hand |
For ¾” shaft arrows, you can hold two in the draw hand and
one nocked to the string. I have found
that even with 2 arrows in the draw hand, it is slightly faster to shoot a draw
hand arrow than a bow hand arrow. I have
seen up to five ¾” arrows held comfortably in the draw hand and fired in
succession; similarly, there is no reason you cannot hold an arrow in the bow
hand, one on the string, and two in the draw hand. However, attempt to hold too many arrows “at
the ready” and your ability to nock any given arrow will be affected by all the
extraneous ammunition getting in the way, slowing you down and defeating the
point. Experiment with different numbers
of arrows until you find a level that you are comfortable with. (I personally go into battle with one arrow
nocked and two in the draw hand.)
 |
| Two in the draw hand, one nocked to the string |
 |
| Four in the draw hand, one nocked to the string |
Another disadvantage to holding more than 3-4 arrows “at the
ready” is, should you find yourself in melee combat before you manage to loose
all those arrows, you’ll have to drop them all to draw your melee weapon. If you win combat and go back to archery, you
will have that many more arrows scattered at your feet, and that many fewer
available in your quiver.
Firing the arrow from the bow hand:
Firing the arrow from the bow hand:
Firing the arrows from the draw hand:
(2) Loading
the bow
At the end of the day, archery is the art of what
works. Every bow and quiver
configuration will lend itself to its own nock-your-arrow process. But among them all, one facet remains the same:
the faster you can get that arrow out of your quiver and firmly on the string,
the less time you spend derping and the more you are a threat.
You also want to do this with the least amount of time spent looking down at your hands possible. An archer needs his eyes on the field, scanning for developments in the line (which you can shout out to your fellows), charging enemies he needs to flee, or picking out his next target/area to support.
You also want to do this with the least amount of time spent looking down at your hands possible. An archer needs his eyes on the field, scanning for developments in the line (which you can shout out to your fellows), charging enemies he needs to flee, or picking out his next target/area to support.
When I draw an arrow, I reach back over my right shoulder to
grasp it just above the fletching. I
then place it on the bow, such that it overlaps both the arm of the bow and the
string. The bow is held at a horizontal
angle. With the index finger of my bow
hand, I create a “hook” into which I slap the arrow. This hook then closes over the arrow shaft,
holding it firmly in place. Then I slide
my right hand back along the arrow shaft till it is holding the nock, and I
twirl the nock so that the off-colored fletching faces outward. Once this is done, the arrow gets set on the
nock.
I can now remove my right hand entirely from the arrow, and
the arrow remains fitted to the string by virtue of being nocked at one end and
held in place by my forefinger at the other.
In this “ready” stance I will make all my movement across the
battlefield – when not in immediate combat, this is my stance when collecting
arrows. It takes a fraction of a second
to move my right hand from whatever it is holding/doing to drawing back the
bowstring to fire, because the arrow is already set and ready.
In this process, you only need to look at the bow at one moment: when you twist the nock to line up with the string. The whole process of drawing the arrow, placing it on the bow, and drawing back the bowstring can be done with your eyes not on your arrow. This puts you in the unique position to be observing the entirety of the field through most of your reload process. The fact that you are not staring down at your arrow as you fit it to the string does a great deal to prepare to you face pushes or sudden developments on the field you might otherwise miss.
Nocking the arrow slowly:
Nocking the arrow at full speed:
(3) Multi
shot
These trick shots have always been possible, but with
improvements in arrow technology, it has become increasingly easy to fire two
or even three arrows at once with good accuracy. While this is a classic movie trick and darn
impressive to see, I have found on balance it is worth neither the extra time
and coordination needed to get that second arrow on the string, nor the
ammunition spent. Nocking and keeping
two arrows on the string takes more time than nocking and firing two separate
arrows, and does not carry the same accuracy.
There are certain circumstances under which time firing two
arrows has proved most useful – that is, unlimited bridge battles or other
choke-point battles, where the lines are quite close and your target stationary
and largely “trapped” with no way to avoid the shots. In this case, putting two arrows into the
chest of an armored fighter can be extremely useful, especially if you just saw
them take another arrow or pike shot to the chest and know your attack will
bring them down. Similarly, an enemy
will occasionally be so surprised at the double-shot that they will be slow on
their reflexes, and not pull back / turn sideways in the line quite as quickly
as if they had been shot twice separately.
If you’re quick and lucky, you can shoot them a third time before they
land a repair item on their armor.
On the down side, it is difficult to marshal two arrows. A target who is not looking at you may not realize he has been struck twice. When using dual arrows, it is often best – for this reason – to target a pikeman and make sure he is looking at you before you fire. If the target recognizes there are two arrows on your bow, he will take both shots; and pikemen are really the only ones you can afford to have looking at you when you shoot them (it is difficult to block arrows with an active pike.)
On the down side, it is difficult to marshal two arrows. A target who is not looking at you may not realize he has been struck twice. When using dual arrows, it is often best – for this reason – to target a pikeman and make sure he is looking at you before you fire. If the target recognizes there are two arrows on your bow, he will take both shots; and pikemen are really the only ones you can afford to have looking at you when you shoot them (it is difficult to block arrows with an active pike.)
(4) Ready,
(aim,) fire!
Aiming is the art of pointing your arrows in the right direction. Every shot should be aimed – you want to hit the enemy, right? – but be very wary of how long you aim at a target.
This is boff archery. Arrows can be mighty accurate, but they will also have a certain amount of built-in inaccuracy (that will increase as your fletching break down). Be careful of the tendency to over-aim – that is, to spend too long sighting your arrow on a target. Combat is fluid, dynamic, and ever-changing. You will often have seconds or less to shoot an arrow at an exposed enemy. Take too long sighting your shot, and the opening will be gone before you can take advantage of it. Plus, if you take your sweet time lining up a shot, there is a high chance your opponent will realize he is being targeted, and then will be alert and defensive, which dramatically decreases your chances of landing the shot. The less time you spend aiming, the more chance you will be shooting him unawares.
Practice taking snapshots: start with your bow at your side
and an arrow fitted, as if you had just nocked it. Then in one continuous motion, bring your bow
up and loose without taking any additional time or pausing the motion to sight
the arrow. This skill will carry over
even in situations where you have more time to aim: you will often find
yourself lined up to shoot one target when, in the flow of combat, a second,
better target suddenly presents itself in a different part of the field. You will be able to instinctively switch
targets and shoot at the new opportunity without having to take time to line up
the new shot. Similarly, you will be
able to use your arrows to feint: you will line up a shot on a target and hold
it, so that other enemies will relax thinking they are in the clear until your
next arrow. Then you swing your aim
around and snapshot them right when they let their guard down.
There are three circumstances under which I deliberately
take the time to aim.
First, bridge battles (or other chokepoints). You are playing an efficiency race with the archers on the other team; aside from your initial volley, you don’t get any more shots than they do. Make yours count more. Additionally, the choke hold makes it so you don’t have to make snap decisions on who to shoot. Pick your target carefully, aim very carefully. Every shot should hit a damaging location.
This is very different from an open field, where it is more important to shoot rapidly at rapidly evolving threats.
Second, when you
are holding multiple opponents at bay.
The threat of an arrow will often cause fighters to hang back, waiting
for you to loose before they move into combat.
You can at times keep 3 or even 4 combatants at bay with the threat of a
single arrow. One person holding off
4? Now that’s efficiency. Similarly, you can use the threat of your
drawn arrow to keep the eyes of fighters in the enemy line on you. Every time they look at you, they open themselves
up to an attack by your fighter friends.
If your friend lands a shot because the enemy was too busy looking at your arrow, then it’s just as good as
shooting them yourself. (Better, because
you still have the arrow to shoot at someone else!) Similarly, holding one or more fighters at
bay gives time for your other allies to come up on them from behind, or to jump
in as cover for you, allowing you to loose the arrow and then reload while they
buy you time.
For this reason, it is vital
that fighters who are working with archer support actively threaten the
enemy. This forces the enemy to choose
between paying attention to the fighter and getting shot, or paying attention
to the archer and getting stabbed.
(Panther talks about this phenomenon in his “You’re a Crappy Archer.”)
Third, when you
are focusing on a deliberate and dangerous single enemy target, waiting for him
to make an opening in his attack. This
particularly comes into play against shieldmen, which I will discuss later.
(5) Drills
for practice.
Take the time to warm
up.
This point was driven home to me again this week at practice
where, due to a knee injury, I was unable to fully participate. Temptation got the better of me despite my
better judgment, and for the last few line battles I borrowed my brother’s bow
to shoot a few arrows. I was shooting
cold – and it showed.
Indoors or outdoors, practice or tournament, quest or war maneuver, take the time out before you engage in any kind of live combat to shoot a few arrows, even if you have nothing to shoot at. Go through your whole stock at least once. If you have the time and an archer buddy, spend fifteen minutes in a clear space shooting back and forth.
Indoors or outdoors, practice or tournament, quest or war maneuver, take the time out before you engage in any kind of live combat to shoot a few arrows, even if you have nothing to shoot at. Go through your whole stock at least once. If you have the time and an archer buddy, spend fifteen minutes in a clear space shooting back and forth.
Not only is this a good policy to improve your shooting
efficiency, it’s a good safety
practice. Any time you return to a skill
that’s been dormant a few days, it’s a good idea to warm up. You wouldn’t walk into a concert and pick up
your instrument cold; if you sit down at your console to play Call of Duty, you
know it will take you a match or two to really get back in the swing of the
game. The same holds true for
archery. Your allies will thank you –
you’ll get more kills in those early matches – but more importantly, your enemies will thank you too. Operating at your best technique means you’ll
be judging the accuracy and draw strength of your arrows as suitable to the
space much better. That means fewer
errant shafts flying through the air, and less chance that you will be overdrawing
your bow for the distances you are firing at.
You are not just re-firing your muscle memory – you are also “calibrating” your brain for archery in the new environment. Every space and weather type will affect your shooting a different way. Is it windy? Are you in an open field? Are you in a closed space (like the arena)? Your distance perception and the flight of your arrows will be affected by all these things. It is to your advantage to “adjust” your archery muscle memory and special awareness to the space in which you will actually be fighting – not unlike the policy of recreating the test-taking environment around you when you study.
You are not just re-firing your muscle memory – you are also “calibrating” your brain for archery in the new environment. Every space and weather type will affect your shooting a different way. Is it windy? Are you in an open field? Are you in a closed space (like the arena)? Your distance perception and the flight of your arrows will be affected by all these things. It is to your advantage to “adjust” your archery muscle memory and special awareness to the space in which you will actually be fighting – not unlike the policy of recreating the test-taking environment around you when you study.
Warm-up Archery Drills
Shooting arrows into empty space will serve when you have no other way to warm up, but here are a few other things to try.
Shooting arrows into empty space will serve when you have no other way to warm up, but here are a few other things to try.
Target practice.
Make sure, first, that you are at a reasonable range from the target – really,
no more than 20 feet. Any target will
serve, but if you can, grab a buddy at practice who will hold a shield for you,
and practice putting the arrow right where you want it on that shield. Then, switch to shooting them in the knee.
(grins) If your buddy is willing to take
the shots, they can also advise you about your draw strength at that distance.
Speed practice. Hold three arrows in your draw hand, and practice
getting them off as fast as you can.
Start off by doing so without any concern for aiming. The slowest, most dangerous part of an
archer’s routine is when you are nocking the arrow; you will want the most
practice getting the darn things on the string as quickly and smoothly as
possible. As your speed improves, add in
a target to snapshot at. This is even
better if you can get a group of archers together and race each other. (There is an apparent and measurable
difference – several seconds – between the fastest and slowest archer in
Mayerling. When a line battle lasts
20-30 seconds, “several seconds” is a heck of a long time.)
Long distance. I have said before, and I will again: long distance archery is, for a most part, a waste of arrows – especially in unlimited fights when any damage will be repaired long before it becomes relevant. The one occasion for long-distance archery is when a single enemy is running across the field. This can happen in an outflank, or when an enemy caster is beelining for fighters to raise. The advantage you have over your fighter friends is this: until they down that newly raised fighter, they don’t have access to the caster. You don’t need to be concerned about that: you can target the running caster directly. (These are also some of the most satisfying shots in the game.) If your practice has general line battles, you will find ample opportunity to practice these shots as the last enemy stragglers run around the practice field, trying to avoid being cornered or killed. During a practice game of capture the flag is also an excellent time to work on this skill. Or, you can bribe your friend(s) to run arcs past you and time your shots to lead them.
Different arrows fly different distances at different speeds. It is important to know how your arrows will cross those distances, and how much you need to lead the fleeing foe to get them.
(6) Target
weapon combos.
The essence of all archery is the same: put your arrow in
the target. The first step to this is to
fire your arrow accurately enough that it will go within a handbreadth of where
you want to put it. (It doesn’t matter
how fast you shoot if you can’t hit what you’re shooting at.) The second step is to fire your arrows quickly enough that you will make this
shot, several times, before your line crumbles and you die. (It doesn’t matter how accurate you are if
you only get off one shot). The third
step is to slip those shots past the defenses of your enemies. No one takes archery lying down.
While every fighter has a different style, the weapon
combination he uses lends itself to certain trends in combat that an archer can
exploit. (Fighters: for tips on how to
cover for these trends, look for Section
7: Revenge… or show up to a practice and learn to counter arrows in the
best way: by dying to them till you discover how to defend yourself!)
The advice that follows is not the be-all end-all of shooting at exploiting these weaknesses. For example, I will make grand claims about how 5’ fighters are just begging to be shot at. At the same time, my brother – who wields a 5’ – is one of the best anti-archery fighters I’ve faced. Why? Because I’ve shot at him so darn much, he has gotten very good at covering the weaknesses of his weapon style against archery. Shooting at him when he is aware and looking at me is, essentially, a wasted arrow, and has all the effect of tossing blood at a shark.
With that said, shooting him when he’s not looking at me is a grand plan. Indeed, that’s every archer’s plan: no one can block what they don’t see coming. Shoot the people who don’t see you. When you do, however, be aware: a surprise blow or shot will always feel more jolting and painful than one your target can brace against. Be very careful with your draw strength when you fire at an unsuspecting foe.
Sometimes, though, you have no choice but to face an enemy
who is aware.
Hand and a half /
great weapons – You love to shoot these, any time, all the time. Preferably when they are not looking at you,
but this weapon style has the least inherent defense against you. Even when they are looking directly at you
and prepared for the shot, the balance of probability says if you get off two
or three arrows, you’re going to take something from them. When they are not looking at you, you can absolutely
destroy them, because there is little chance their weapon will inadvertently
get in the way. This especially holds
true for pikemen, who effectively have no defense against you, as their pike
attack position does not allow them to deflect incoming arrows, even when they
are looking right at you.
True Florentine –
While two-stick is not a popular combo, you will encounter it from time to
time. Putting an arrow between the
blades is feasible, but the best spots to aim for on true Florentine are the
upper shoulder and the middle of the stomach.
Both can be punched out of the air, but they force the Florentine
wielder to open up his stomach or his shoulders for your melee friends when he
moves to block them. If you cause an opening
that your friend takes advantage of, it is just as valuable as shooting the
enemy directly.
Marnes – Marne-wielders can be deceptively difficult to shoot. Their tendency to punch-block with the marne against arrows will brush your incoming shots out of the air. When shooting a marne-wielder not engaged in combat, drop the angle of your arrow to make it appear you are aiming for the knee – an awkward location for a marne-wielder to defend against. If they take the bait and lower their marne slightly in preparation, snap the arrow angle up and loose all in one motion. Since they are mentally prepared to jerk the marne down to deflect, you may find them a beat slow to recover. A beat is all an archer needs. A shot high on the chest on the marne side is the most likely to land under these circumstances. If they don’t lower the marne in preparation to block, just shoot them in the knee. ;) The key to this maneuver is deception. They must genuinely believe your shot is going low, because you are sighting your arrow low – while the intention all along is to snapshot them to the chest.
Alternately, a marne wielders tends to be an aggressive fighter, and will lean forward in combat, extending his range while keeping his torso away from the opponent. (A look through any Realms gallery of fights-in-action will show off this trait.) It is generally not advised to shoot an engaged marne-wielder from the front, as his rapidly moving weapons are very likely to clip your arrow in flight by accident, fouling the shot. Take up an angled position, 2 or 3 fighters down in line. Then wait until the marne wielder engages his opponent. When he does so, he leaves his side from hip to shoulder open. Note that due to the angle of attack, these shots are frequently taken as back shots; plan accordingly.
Shields – If you are being rushed by a shieldman, the leg is your only option. (A shieldman will often leave the top of his shoulder – a valid target – also exposed, but he will be able to snap the shield off to deflect any arrow aimed there easily. Don’t go for it). Aim for the middle of the shin… low enough that they are unlikely to block by dropping the shield, high enough that if they jump you will still clip a foot.
In limited combat line battles, the knee is a great
option. No one loves to rush an archer
like a shieldman, where their rapid approach cuts off your angles of fire. By taking a knee while they are still engaged
in the line, you guarantee that – even if they defeat your fighter ally – they
will find it difficult to run you down.
In unlimited combat, shooting a leg that early in the fight is a wasted
shot, as either it is armored, or it will rapidly be healed.
While landing a kill shot on a shieldmen from the front is (obviously) difficult, it becomes much easier if you tackle them at an angle – especially from the sword side, where the same trick of shooting their exposed side applies as can be used against marnes.
Sometimes, though, in cramped quarters, you simply do not have the leisure of taking a slanted angle against shieldmen, and you must face them head-on from behind your own line. Inspire awe and win friends by taking out shieldmen from the front… especially wielders of coffin-shields who appear to be completely protected from shoulder to foot. It can be done, and indeed, done well – and it will make you proud of your accomplishments as an archer when you pull it off.
All shieldmen have what I call “attack patterns” –
coordinated movements of sword and shield, in tandem, that are effective for
melee fighting with their opponent.
Ingrained in muscle memory, these coordinated movements happen by
instinct. Good shieldmen will by no
means limit their repertoire to these movements, nor will the shieldman employ
them against you, the archer. Your fighter friends, though, are fair game;
and in a fast, tight melee battle, these patterns will make an appearance again
and again.
Watch the shieldmen at practice. Learn their attack patterns. Even the best shieldmen will have moments –
fractions of a second – where moving their shield to cover openings in their melee
defense caused by a strike will expose their torso to line of sight, even though
the pattern covers them from retaliatory strikes in melee. As an archer, you are not concerned with
angles of strike, however: line of sight is all you need.
These exposures are only fractions of a second long. Even if you are aimed right at them with your bow drawn, if you wait until you can see the opening before you loose your arrow, the shield will be back in place by the time the arrow arrives on target, and your shot will bounce harmlessly away. (We’ve all done this!) If, however, you know the attack patterns of your target, you will begin to recognize the movements of arm and body that indicate what pattern they are about to use. You will know when the opening is going to be, before you can actually physically see it. You will be able to release your arrow while the shieldman is still protected by his shield, knowing that by the time the arrow reaches the target – less than a second later – that spot will be exposed. The shieldman will often finish his attack pattern, snapping the protective shield back down in place, only to look with astonishment at the arrow tangled between his shield and his chest. How did that get in here?
These exposures are only fractions of a second long. Even if you are aimed right at them with your bow drawn, if you wait until you can see the opening before you loose your arrow, the shield will be back in place by the time the arrow arrives on target, and your shot will bounce harmlessly away. (We’ve all done this!) If, however, you know the attack patterns of your target, you will begin to recognize the movements of arm and body that indicate what pattern they are about to use. You will know when the opening is going to be, before you can actually physically see it. You will be able to release your arrow while the shieldman is still protected by his shield, knowing that by the time the arrow reaches the target – less than a second later – that spot will be exposed. The shieldman will often finish his attack pattern, snapping the protective shield back down in place, only to look with astonishment at the arrow tangled between his shield and his chest. How did that get in here?
Everyone knows the importance of knowing your enemy’s fight style when you are engaged in melee
combat against him; knowing his strengths and weaknesses, what attacks he
favors and what blow angles slip past his style. It is equally
important to know the style of your enemies when you are shooting at them. Archery is a weapons skill like any other. At whom you are shooting at is equally
critical as how you are shooting.
Know how to shoot; know whom to shoot. And know when
to shoot them. That third aspect
requires a post all its own… so tune in next time for Part 3: Threat Assessment.
Till then, stay on target.